How To Reduce The Size Of A Photo? Explained
If you are wondering how to reduce the size of a photo, then here is a comprehensive guide for you. There can be multipronged reasons you might need to reduce image file size. It becomes easy to upload or email a small size image. Besides, many websites keep the image size of the profile and post pictures limited to keep the loading speed optimal. Furthermore, large-size images take more storage space than a hard drive. Considering these points, you may need to reduce an image file size now and then. Reading this full post can help you with how to reduce the size of a photo in easy steps.
Table of Contents
What is an image file size?
Images are composed of several dots called pixels, and every one of them features a color, represented as a combination of the basic colors red, green, and blue. To store each of those pixels, 3 bytes (24 ones or zeros) are generally used. When a picture is large, it’s going to have many pixels, which means storing all information for a picture like that during a computer or any device will take many bytes. It’s why you ought to have the skills to scale back the dimensions of a photo.
When a camera or telephone says it takes 10 megapixels of photos, it means each photo has 10 million pixels (mega = million). And having 10 million pixels means it takes 30 million bytes (or 30 megabytes) to store that photo (which may be a lot of space!). If you would like to send this photo (or many photos) to a lover by email, it’ll need to transfer 30 megabytes of knowledge, and it’ll take a short time to upload it and tons for the recipient to download it later.
Several Ways to scale back The File Size
Below are a couple of effective ways in which can assist you on the way to reduce the dimensions of a photo:
pc: https://www.apptha.com/
1: Reduce The Image Size Using Paint
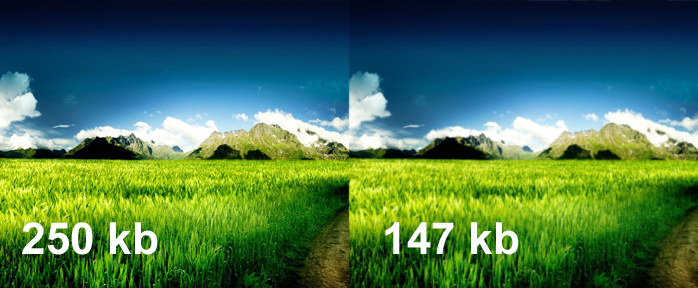
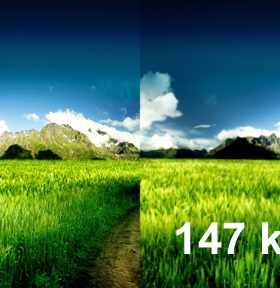
In Paint, simply click the “Edit” drop-down, then choose “Resize” to open the sizing tool. Choose the resize by Percentage and reduce support for the present photo size. For instance, a 100 KB photo will reduce by 80-percent to hit the 20 KB mark.
How to reduce the size of a photo using “Paint” in Windows 10, 8, 7, or Vista:
- In Windows 10: First of all, click the Search icon or box, type Paint, and click on on the Paint desktop app.
- For Windows 8: On your Tiles screen, type Paint, and click on the App icon for Paint.
- In Windows 7 or Vista: click the beginning button Picture of the beginning button > click All Programs > click Accessories > then click Paint.
- Click enter Windows 10 or 8 or on the Paint button Picture of the Paint button in Windows 7/Vista > open > select the image or image you would like to resize > then open.
- On the house tab, within the Image group, click Resize.
- In the Resize and Skew panel, select the Maintain ratio check box in order that the resized image will have an equivalent ratio because of the original picture.
- If the Maintain ratio check box is chosen, you simply have to enter the horizontal value (width) or vertical value (height). The opposite box up the Resize area is updated automatically.
- Do one among the subsequent within the Resize area, then click OK:
- To resize your picture by a particular percentage, click Percentage, then enter a percentage to scale back the width within the Horizontal box or a percentage to scale back the peak within the Vertical box.
- To resize the image, so it is a specific size, click Pixels, then enter a replacement width within the Horizontal box or a replacement height within the Vertical box.
- Click enter Windows 10 or 8 or the Paint button Picture of the Paint button in Windows 7/Vista > point to save lots of as > then click the image file type for the resized image.
- Type a new file name within the File name box, then click Save.
To Resize an image or image using “Paint” in Windows XP
If you’re unsure of the way to reduce the dimensions of a photograph using this procedure, check the below-given steps:
- Click Start > All Programs > Accessories > Paint
- On the Paint Menu, click file> Open > change “Look In” to the situation of the image to be resized > open.
- On the Paint Menu click > Image > Stretch/Skew
- To maintain the first width-to-height ratio, enter an equivalent percent (such as 50%) for both Horizontal and Vertical under Stretch. Note: don’t enter any Horizontal or Vertical Degree value under Skew.
- Click okay to preview the resized image.
- Click File > “Save As” > enter a filename > click Save.
2: Reduce File Size Using Online Compression Tools
Compressing photos employing a web-based program is fast and straightforward. Run a fast look for “JPEG Compressor,” and you’ll see an inventory of free programs. You should avoid signing up for any email alerts or paying a fee as many free options exist. Also, use an internet-based program to prevent downloading software or malware on your computer.
You can upload the photo to their compressor, set the file size, and it’ll compress the file. When finished, click the download prompt to save lots of the new photo. The photo is prepared to be used after you’ve saved the new file.
Why Use Online Image Compressors?
Compression doesn’t touch the particular dimensions of the image. Instead, it reduces the file size of JPEG, BMP, SVG, or other image files. This is helpful once you decide to either upload your images online or send them via email. Even sending files via WhatsApp, there are file size restrictions that may prevent you from sending larger images. If you compress images, you’ll reduce the image’s file size either by touch or by tons until you easily upload or send it.
Final Words!
Hope your doubt on how to reduce the size of a photo is now clear after reading this post until the end. This post elaborates on two of the most effective ways to reduce an image file size. If you like it, then visit our blog section to find some more posts on handy tools and technology.
 Tagged:
how to reduce a picture size, How to reduce an image size, How To Reduce The Size Of A Photo
Tagged:
how to reduce a picture size, How to reduce an image size, How To Reduce The Size Of A Photo